I promised a rain barrel tutorial (like the one on the fire escape but not blocking the egress in my last post) for a friend, so here it is!
Stuff you’ll need:
*Plastic Barrel with lid – food safe…they come in 5 , 15, and 30 gallon sizes. I’ve done these with trash cans, but I’m not super sure of the food-safe-ness of them, and they’re a lot flimsier than food shipping barrels and tended to break more easily.
*Drill – cordless preferred, but not required.
*1″ spade bit that fits said drill.
*silicone caulk labeled for outdoor use – I’ll put a picture of mine down below
*fittings – definitely a spigot, possibly a hose attachment — 3/4″ and 5/8″ fittings both fit in the holes that 1″ bits make.
*some washers that fit over the base of your fitting (3/4″ in my case)
*a bushing that fits over your fittings
*some plumber’s tape (this is semi-optional – it’s my first time using it and I think it’s a good idea, but I’m not totally sure if it’s crucial yet)
*a hunk of window screen that fits over the top of your barrel
*scissors or garden shears

I got this barrel on craigslist for $12 – it’s foodsafe (there’s a symbol on the bottom of a fork and a spoon, if you’re checking – but the person you’re getting it from should know both if the barrel is foodsafe and what it was used for). This one was used for peppers, apparently. This type holds 30 gallons and has the added bonus of being a sort of neat shape (not fully round and tapered top and bottom). I chose plastic because it’s lightweight and easy to work with – no special tools needed!

The first thing I like to do is punch holes in the lid. I’m using a 1″ spade bit for all of the holes – you could make the top drain holes a different size than the holes in the main body of the barrel, but I don’t really see the point. Look, that’s me! Drilling! Punch holes all over the lid. Get fancy! Or not! Make it look like swiss cheese! Sorry for not wearing eye-protection, mom!

Lay the barrel on its side and punch a hole toward the bottom. The lower it is, the higher off the ground you’ll have to put it so that you can fit your watering can under it…the higher that it is, the more water you have to have in order to access your water. It’s a conundrum. I always eyeball it. On these, I like to put it just below the start of the barrel’s taper. Turn the barrel to the side and put another hole up near the top – this is your overflow, so don’t go too low with it.

When you’re done poking holes, your barrel should look like this. At this point, I’d go ahead and dump any plastic shavings from the barrel into the trash.

These are my plumbing items all lined up. You don’t need a fancy spigot, unless you’re me…in which case…you need a fancy spigot. The plumber’s tape looks like medical tape but has no stick to it…and then there’s the washer and the bushing. We went right to left on that, in case you were wondering. 🙂

When all assembled, they’ll look like this… but with a barrel in the middle.

Next, wrap plumber’s tape around the threads of the spigot once or twice.

Then goop on the caulk. Goopy!

This is the caulk I’m using. I recommend knowing what you want instead of going to the hardware store and asking the guy to help you find some caulk…and then spending the entire conversation over-pronouncing the word caulk so as not to fuel some weird porno fantasy he may or may not already be having about you. 😉 The key to the caulk is not shrinking or cracking, being rated for outdoor use, and being silicone. I also like the not molding part.

The great part about the 1″ hole is that it’s snug enough to a 3/4″ fitting that it actually allows it to screw in (rather than just pushing through). I feel pleased about that. This is what the outside looks like after you’ve screwed the fitting in (caulk and all)…reached waaaaaaaaay down into the barrel and added a washer or two (enough to make the bushing screw tightly on and press the washers to the barrels in one, tight mush)…smoothed the inside caulk and possibly added a little more to make it seal up tightly and then smoothed the outside caulk to a tidy-ish seam.
If you have short arms like me, this part may involve having a friend steady the barrel while you wriggle into it to place your fittings. It’s hilarious to watch but sort of annoying to do. No photographs, please.
If you want to put a hose attachment on your barrel, it’s the same procedure except easier because you don’t have to crawl into the barrel. I was going to put one on, but can’t find it. It’s nice to do while you have the caulk out….but you can always add it later.

Next, lay some window screen over the opening of the barrel. Precision is not terribly important to this step. Mostly just make sure it covers the opening and overlaps on all sides.

Mash the lid on and trim the screen. This is way easier than it looks.

……aaaand done. Probably about a 30 minute total project.
I know you’re now dying to test it out, but the hardest part of the project yet remains…waiting for the caulk to cure. I always give it 24 hours. You could probably wait 12 (which I think is what the container says), but I don’t like to risk it.
Happy Rain Water Harvesting!
Tags: DIY, rain barrel, tutorial, water
 Observe – I clean up well, and enjoy wearing dresses (not just my bee suit). Also, my dress is Rhode Island themed. Not really. I have always loved nautical things.
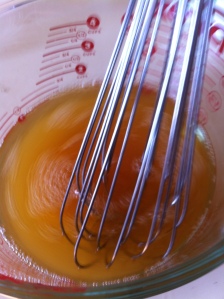
 After it’s set – strain it into a measuring cup – for every cup of water, I add 2/3 cup of honey. You can go 1:1 and for more strongly “scented” syrups – but I find that the honeysuckle gets lost easily with too much honey – unlike mint which can stand up to it a bit better. Whisk the honey in until it’s dissolved – on a warm day, you shouldn’t need to add any heat to it – but if you do, you can feel free to transfer it to a pan – just DON’T LET IT BOIL!


